
Since www.libe.net has a very good installation guide here (I linked to their screenshots in the steps below) and even a video there, I will just quickly walk through the steps that I followed and that I consider important. Basically, they follow the official Ubuntu installation guide to install Ubuntu from a stick as described here.
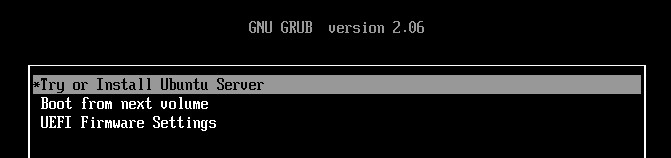
When the installation medium is inserted (DVD or USB stick) and the PC is booted, the GRUB bootloader will appear. If not, you might want to consider these steps.
So, we will select the option to install Ubuntu.
The installation type is a standard Ubuntu server:

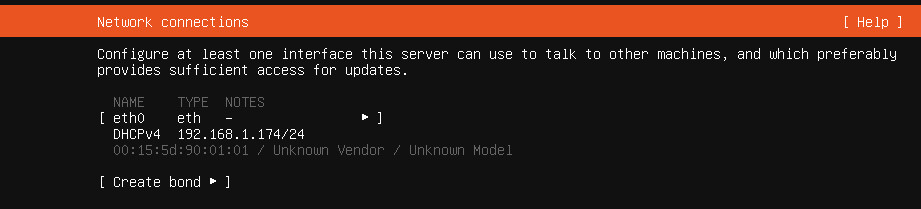
The wizard guides us through the network settings and through setting up the profile:

I went for mini-pc as the hostname in my setup, but you can use whatever you like (as long as it is supported by Ubuntu). Here, you also define your username and password.
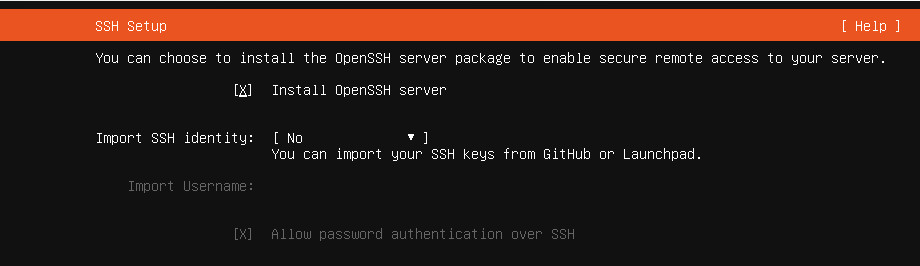
To be able to administer the server in a headless setup over the network, enable the OpenSSH server:
 Docker could be easily enabled as a “featured server snap” during server installation, however, do not do so! We will install it via apt later.
Do not forget to set the time zone on the server! First, check the time zone by calling timedatectl. If the time zone is not set correctly, get the correct time zone name (here with Berlin as an example) by calling
timedatectl list-timezones | grep BerlinThe output will be
Europe/BerlinNow change the time zone by calling
sudo timedatectl set-timezone Europe/BerlinAnd you are done! You should now have a working Ubuntu server and we can continue to the next steps.
◄ Hardware Hard Drives ►
Wenn Sie diese Felder durch einen Klick aktivieren, werden Informationen an Facebook, Twitter, Flattr, Xing, t3n, LinkedIn, Pinterest oder Google eventuell ins Ausland übertragen und unter Umständen auch dort gespeichert. Näheres erfahren Sie durch einen Klick auf das i.